Getting Started with Python
In the upcoming tutorials, you’ll build essential algorithms entirely from scratch. That means a bit of coding knowledge will be helpful. This page is for those who are completely new to coding—or have very little experience with it. If you already know the basics or feel confident with code, feel free to skip ahead.
My approach to learning programming is the same as how I’d learn a new human language—say, Spanish. In my opinion, the best way to learn any language isn’t by memorizing grammar rules or vocabulary lists, but by immersing yourself in it. Even if you don’t know a single word, just interacting with the language—using it, seeing it, hearing it—helps you naturally build the connections you need. Think of how babies learn to speak. They don’t sit down and study the difference between ser and estar. They learn by doing, by listening, by trying.
And that’s all you need here, too: curiosity. If you’re open, if you’re willing to admit you don’t know something and excited to learn anyway, you can pick up anything.
So I won’t start by dumping all the rules on you. Instead, we’ll learn by doing.
Let’s get started.
Where to Start?
The programming language we’ll be using—and the standard in the world of machine learning—is Python. Python is known for being simple, readable, and beginner-friendly, which makes it a great starting point.
Like any programming language, Python comes in different versions. Each new version brings updates—some useful improvements, some… not so much. For consistency, I’ll be using Python version 3.13 throughout this course. If you’re following along, I recommend using the same version to avoid any unexpected issues.
To make your life easier, I also suggest using an IDE (Integrated Development Environment). An IDE helps you write cleaner code, spot mistakes quickly, and often suggests fixes as you go. It also makes organizing and managing your code a lot more comfortable.
Some great (and free) IDE options include Visual Studio Code and PyCharm. I personally use PyCharm, but either will work just fine.
You can download them here:
Installing Python
First, download and install your preferred IDE by following the instructions on its official website. If you’re using PyCharm, you can install Python directly through the IDE, so there’s no need to download it separately. However, if you’re using another IDE (like Visual Studio Code), you’ll need to install Python manually.
You can download Python from the official website:
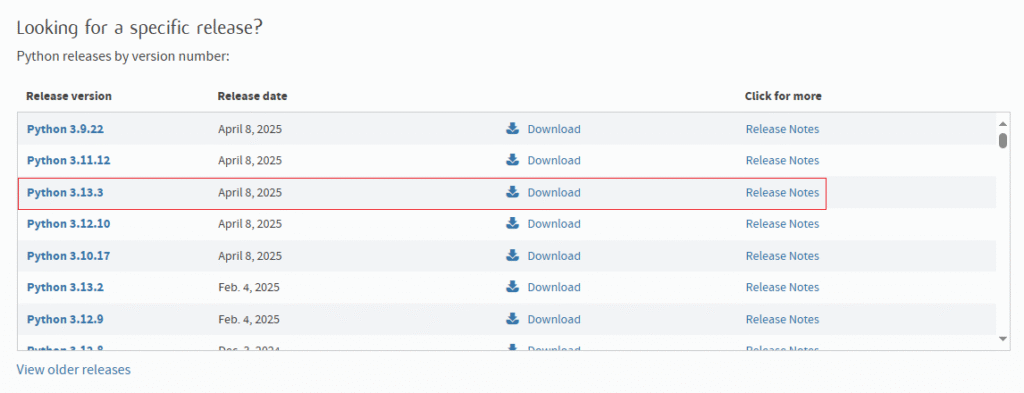
Look for the section labeled “Looking for a specific release?” and select Python 3.13. It doesn’t matter whether it’s 3.13.3 or 3.13.2—just make sure it’s version 3.13 (not 3.11 or any earlier version).
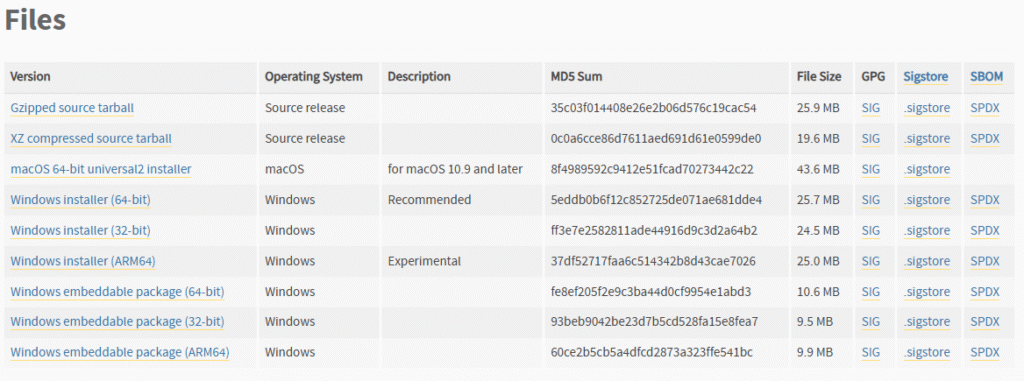
Scroll to the bottom of the page until you find the “Files” section. Download the appropriate 64-bit installer for your operating system:
- Choose the Windows Installer if you’re on Windows.
- Choose the macOS installer if you’re on Mac.
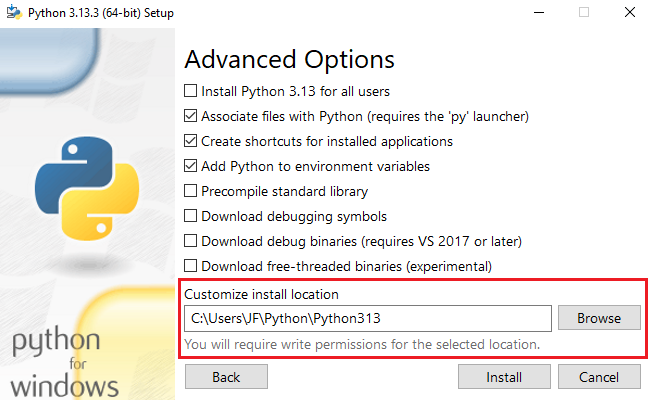
After downloading, run the installer. At the bottom of the installation window, you’ll see a checkbox labeled “Add python.exe to PATH.” Make sure to check this box—this allows your IDE to detect your Python installation. Then click “Custom installation.”

Then, click Next, and in the field labeled “Customize install location”, choose a folder where you want Python to be installed.
For example, mine is:
C:\Users\JF\Python\Python313
It’s very important to remember this location in case your IDE (like PyCharm or Visual Studio Code) can’t automatically find your Python installation later.
Finally, click Install to begin the installation.
Once the installation is complete, you can close the window.
To check if you have installed it correctly follow these steps:
- Open the Terminal—on Mac, press
Cmd + Spaceand search for “Terminal”; on Windows, press the Windows key and type “cmd”, then press Enter. - Type the following command and press Enter:
python3 --versionIf Python is properly installed and in your PATH, you’ll see something like:
Python 3.13.3If you see an error like command not found, it means Python either isn’t installed or isn’t linked correctly in your system PATH.
If it’s not appearing, a quick restart of your computer might help—then check again. If it’s still not appearing, I would recommend reinstalling Python or adding its folder manually to the system PATH.
Pycharm
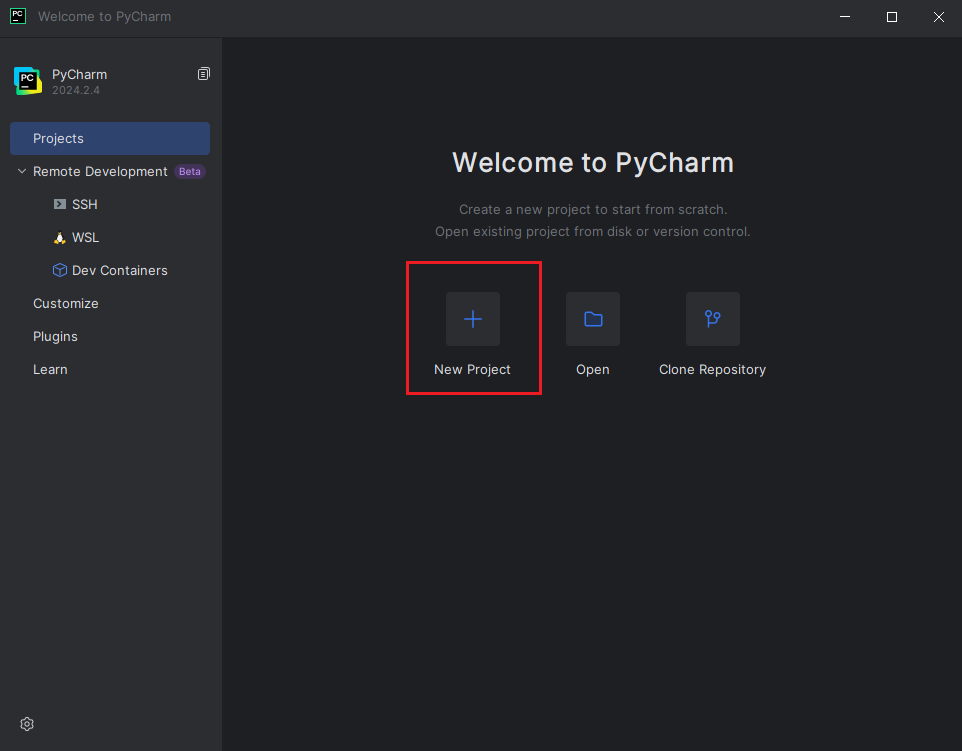
Open PyCharm and click “New Project.” Give your project a name—something like TutorialProject works well.
Next, choose the Python version you will be using for this project. You can either:
- Select the version of Python you just installed, or
- Let PyCharm install one for you.
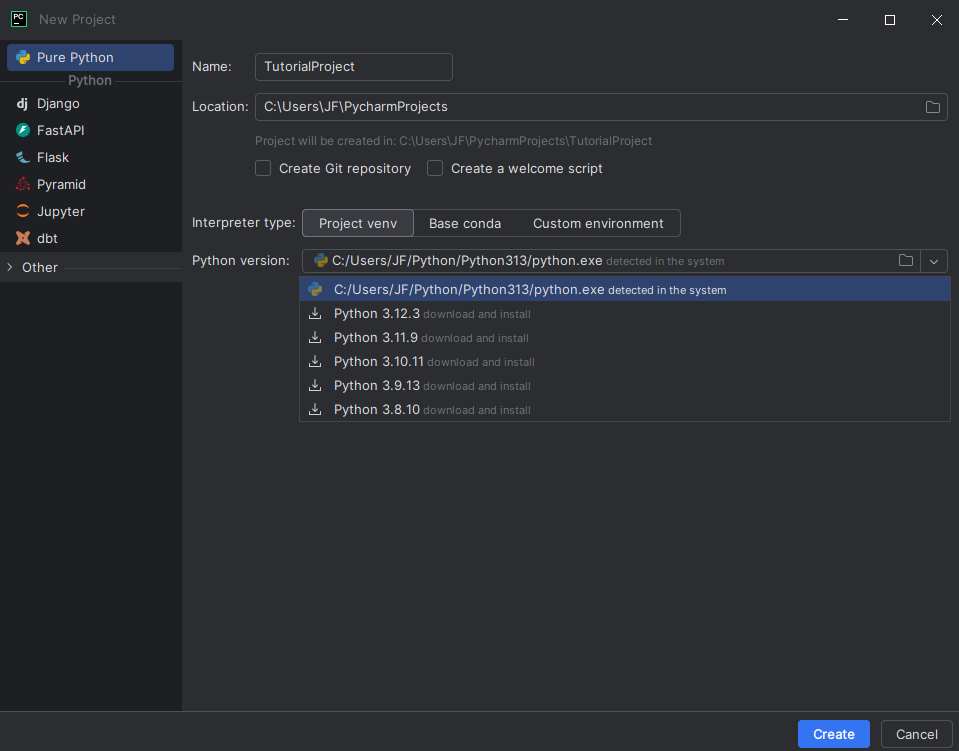
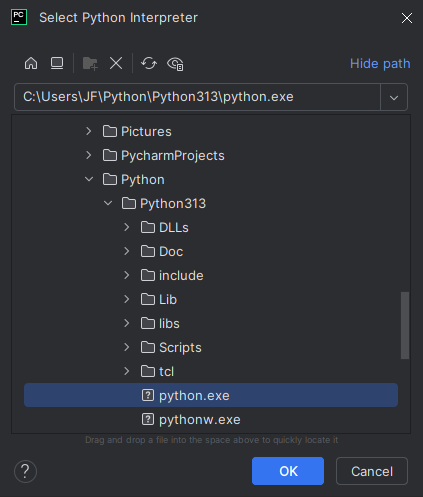
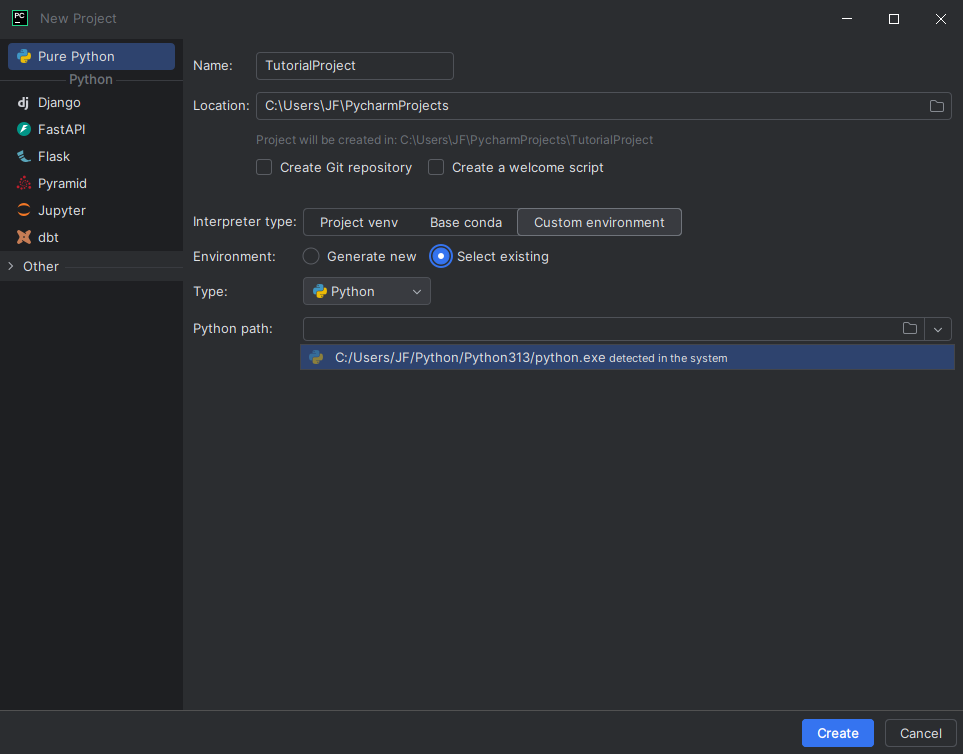
Choose it then press the Create button. PyCharm usually detects your installation on its own. If it doesn’t, select Custom Environment. Under the Environment section, choose Select existing, then click Browse next to the Python path.
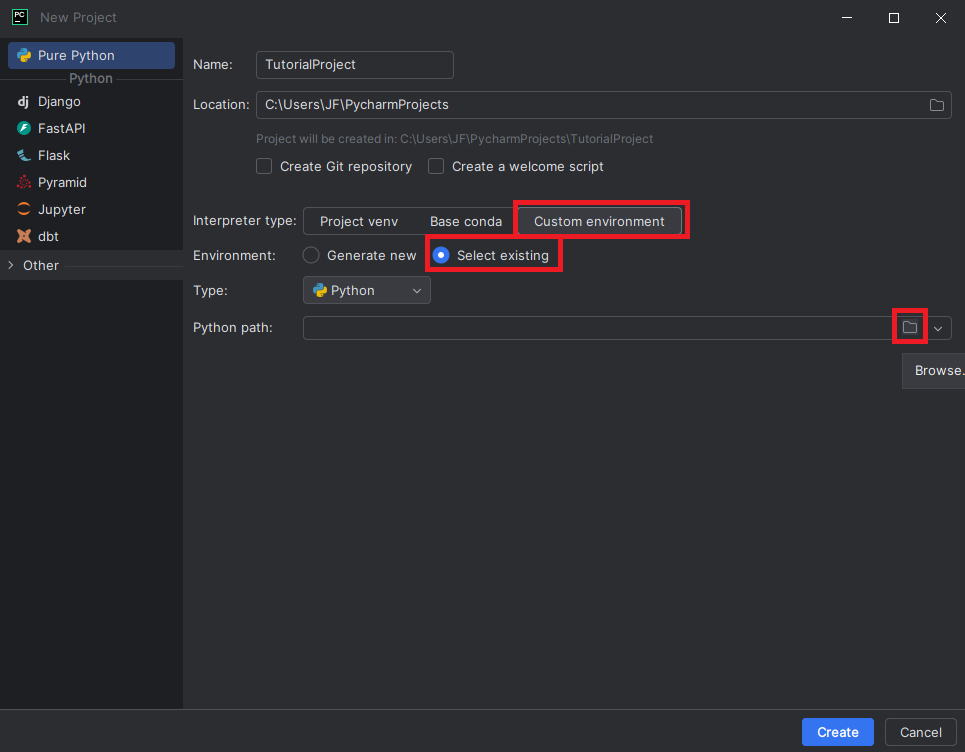
Here, navigate to the location where you installed Python earlier. Make sure to select the python.exe file specifically.
After selecting it, click the Python path dropdown again — your installation should now appear as an option. Choose it, then hit the Create button to finish setting up your project.
After your project loads:
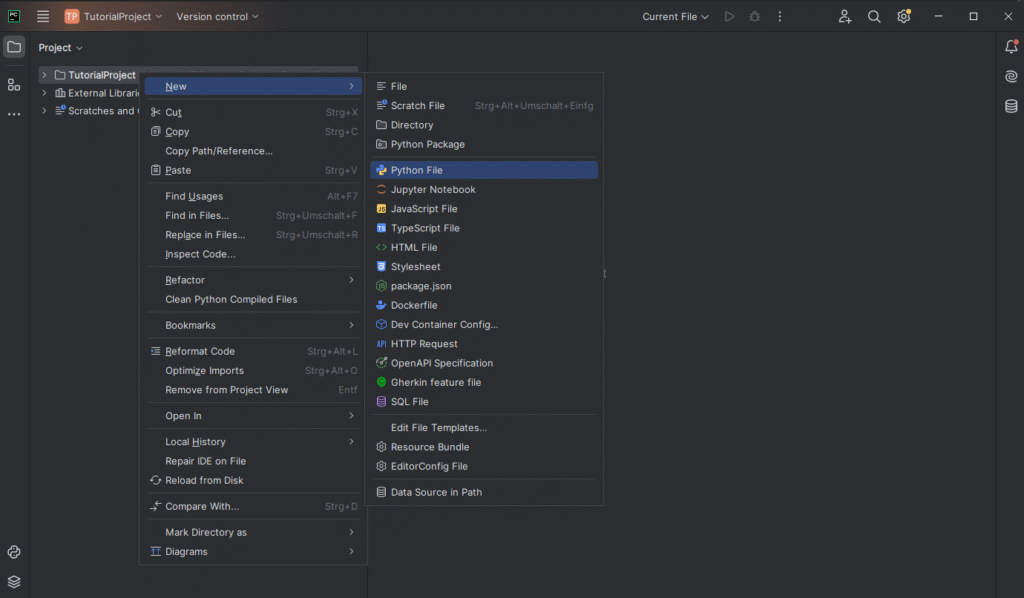
- Right-click on the project folder.
- Select New > Python File.
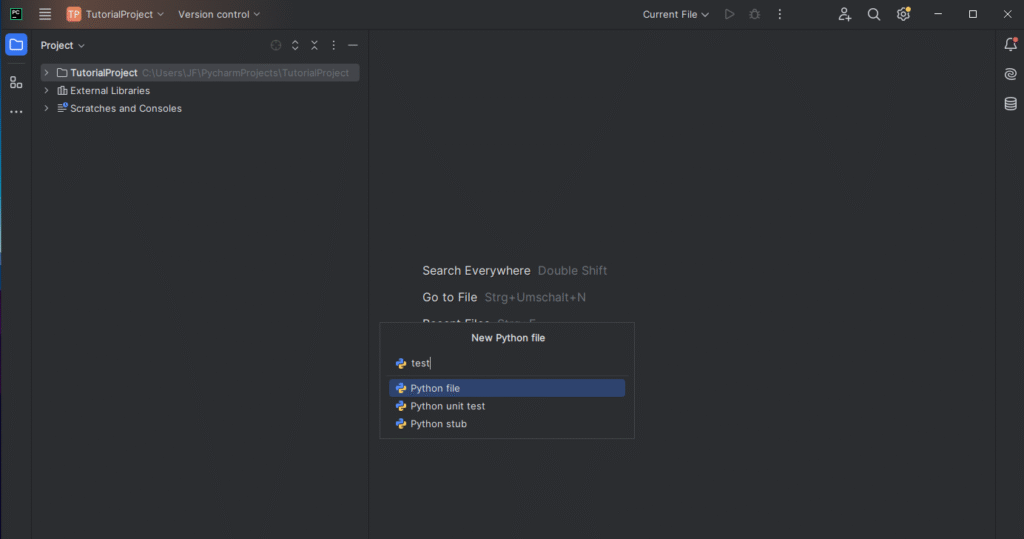
- Name it something like
testand press Enter.
Now you’re ready to start coding!
Visual Studio Code
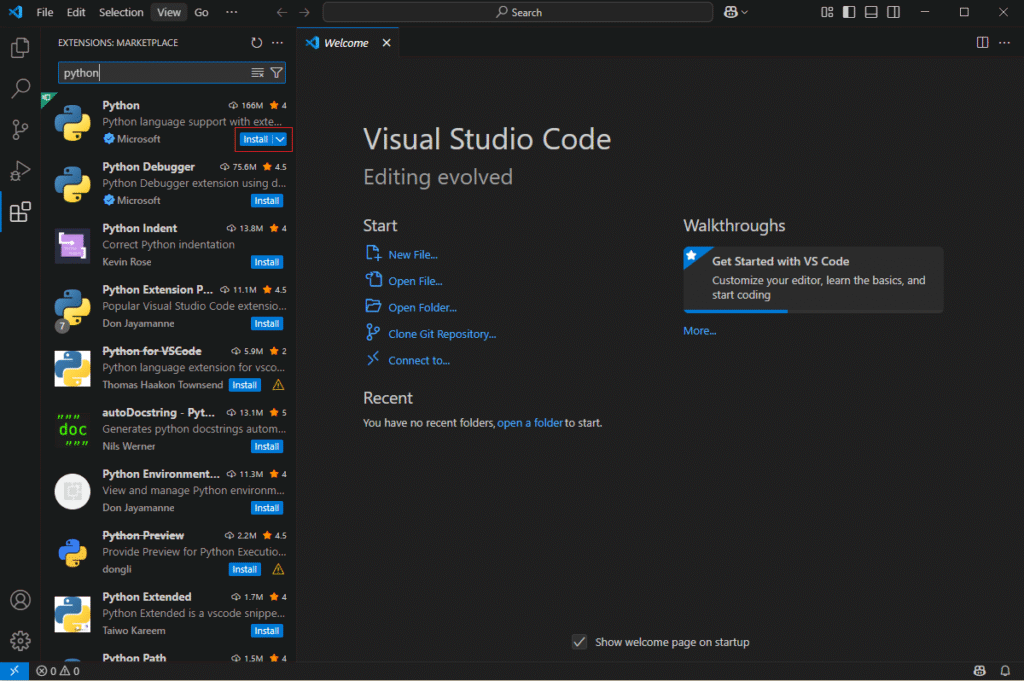
If you’re using Visual Studio Code, start by opening the Extensions tab (the square icon on the left sidebar). Search for the extension named “Python” (published by Microsoft—it’s the one with the most downloads). Click Install.
Once installed:
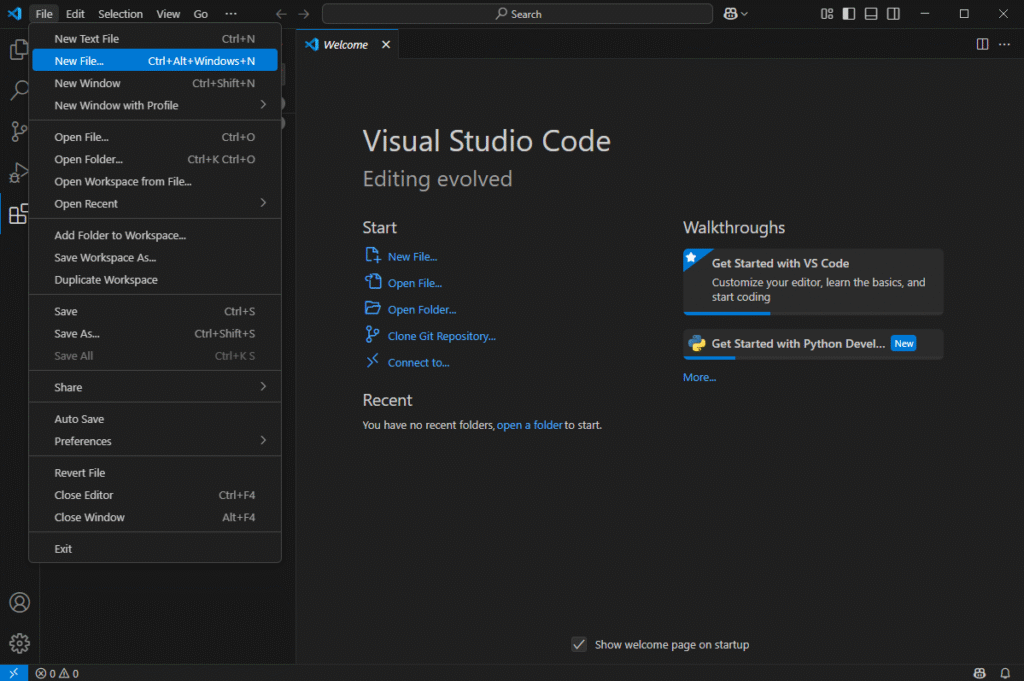
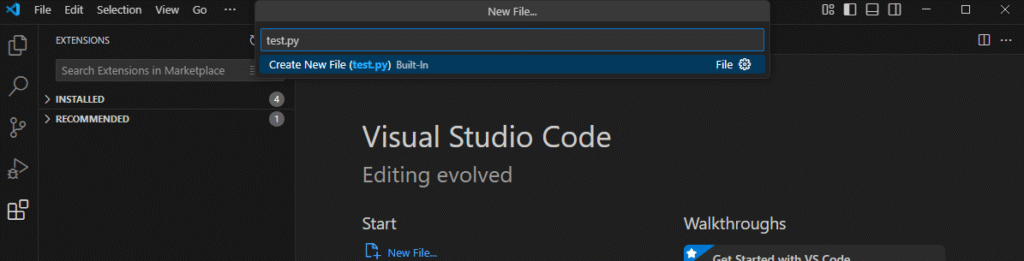
- Go to File > New File.
- In the new file, type
test.pyand hit enter.
This creates a Python file named test.py (Python files always end in .py). Save it anywhere you’d like.
You’re now ready to write your first line of Python code!
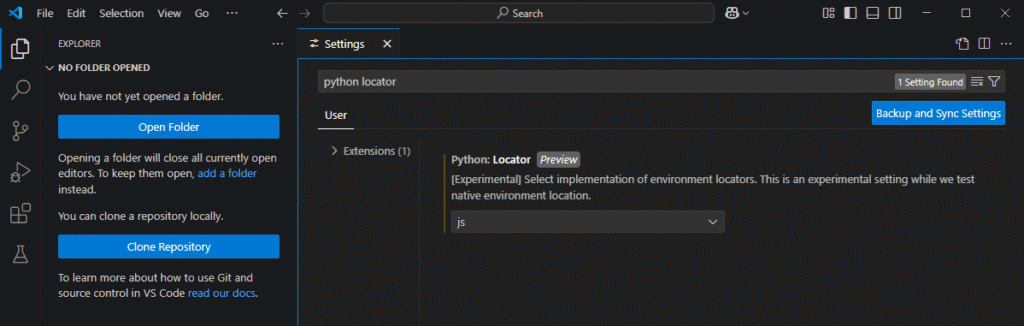
Note: Visual Studio Code should automatically detect your Python interpreter. If it doesn’t, do the following:
- Go to Settings (click the gear icon at the bottom of the left sidebar).
- In the search bar, type Python Locator.
- Once you find the Python Locator setting, change its value from native to js.
After that, restart Visual Studio Code. It should now correctly detect your Python installation.
Alright, the moment we’ve been waiting for—let’s get coding!